When returning from a trip to Ireland recently, my friends were disappointed with some of their travel photography, especially from attempts inside dark pubs and Cathedrals (not necessarily in that order). Since my wife and I had also been with them on this trip, we were all pretty much in the same places at the same time, but came home with varying degrees of success with our low-light photography. So I deemed a "photo-day" was in order, and we recently all met for a sort of workshop so I could share some tips and tricks I use for low-light photography with the group. In researching talking points for the class, I came across this rather nice guide from snapsort.com. Thanks to them for sharing this:

One of the best things you can do to improve your photographic results is to get your camera off of "Auto". Say the following like Frankenstein's Monster: "Auto baaaad..."
I thought Snapsort's guide does a rather good job of explaining in an easy to understand way the benefits of choosing the proper aperture, shutter speed and ISO. The only small quibbles I might have based on my unique needs with this particular group, is the guides suggestion to get off Auto and onto Aperture Priority.
Now, I use AP quite a lot, and actually used Aperture Priority in my photos of the Chapel this day. But I think its best to get onto full Manual first, in order to build an understanding of the aperture/shutter speed/ISO relationship, before stepping back into Aperture or Shutter Priority mode.
Also, in the "Take Photos like a Sniper" section (I highly recommended you to start here, by the way) the word "figure" should be "finger"
After spending some time with the group going over using Manual settings on their Canon and Nikon DSLRs, and how to hold the camera, proper stance, and proper breathing for best chance at slow shutter speed success, we headed over to Duke University's Chapel to put theory to practice.
The inside of the Chapel was as as dark as I had hoped, and really put fast apertures, steady hands and high ISOs to the test. I was impressed with every member of the group's ability to try the new things they had learned, and it was evident that the "keeper" rate had increased significantly for just about everyone (except my wife, who insisted on staying on "auto" except for a very few photos - oh well)

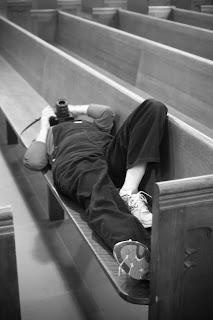
As you can see from the photo above, people in the class were really good at seeking out new angles and details in the Chapel, and due to some recent lens acquisitions for Christmas, some were able to readily see the low-light advantages a f:1.8 lens had over, say, their f:3.5 kit lens.
I'll leave you with some final low-light tips and photographs:
- Hold your camera by supporting its weight under the lens with your left hand. You should ideally be able to hold your camera by cradling under the lens with your left hand only, leaving your right hand free to operate shutter button and other controls smoothly.
- Stand with your feet shoulder width apart, with one foot facing where your camera is aiming, an the other foot turned perpendicular to this for maximum stability.
- Brace the viewfinder against your face, with elbows tucked against your torso, creating your own 3-point "tripod" with your body.
- Exhale slowly while gently squeezing the shutter. You should apply pressure slowly, incrementally till the shutter fires somewhat unexpectedly, no "jabbing". Have someone watch the tip of your lens from the side as you practice, there should be no visible movement when you trip the shutter.
- Don't fear the noise - raise your ISO to what's needed to get your shutter speed into comfortable speeds. Better a noisy (remember film grain?) sharp photo than a smooth blurry one (unless you're going for that effect).


The two photos above were taken with my little Olympus EPL2, with Nikkor 50mm 1.8 legacy lens (same rig shown in the blog's Title photo) at ISO800.
Great tips in this article. I learned more useful information in an hour with ShutterPilot, than I have reading any book or article on photography. My wife took a lot of great pictures at the Chapel. I can't wait for the second class, there will be a second class right?
ReplyDeleteHappy to have another class - let me know what you guys might want to cover next, I'm sure it would be good fodder for the blog.
ReplyDelete